As a small business owner, configuring your firewall and antivirus settings is essential for protecting your online operations. These settings create a defense against cyber threats, ensuring that your sensitive data remains secure. This guide will walk you through the necessary steps to set up these protections, even if you lack technical expertise.
Why proper configuration is crucial for your security
Misconfigured firewall and antivirus settings can leave your business vulnerable to cyberattacks, malware, and data breaches. A firewall acts as a barrier between your internal network and external threats, while antivirus software scans for and removes malicious software. When set up correctly, these tools work together to safeguard your systems and enhance your overall security. Inadequate settings might allow unwanted traffic or fail to detect threats, putting your business at risk.
What you need before starting
Before you begin, ensure you have the following:
- Administrative access to your computer.
- The latest updates for your operating system and security software.
- A backup of critical data, just in case something goes wrong during configuration.
How to configure your firewall settings
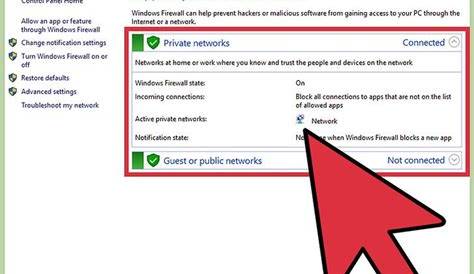
Configuring your firewall settings is straightforward on both Windows and macOS. Follow these steps:
For Windows:
- Open the Control Panel by searching for it in the Start menu.
- Click on "System and Security" and then "Windows Defender Firewall."
- Select "Turn Windows Defender Firewall on or off" from the left panel.
- Choose the option to turn on the firewall for both private and public networks.
- Click "OK" to save your settings.
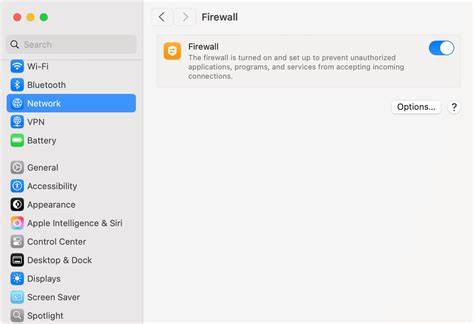
For macOS:
- Open "System Preferences" from the Apple menu.
- Select "Security & Privacy."
- Click on the "Firewall" tab.
- If the firewall is off, click "Turn On Firewall."
- Click "Firewall Options" to customize settings, such as allowing specific applications.
How to configure your antivirus settings
Setting up your antivirus software effectively can greatly enhance your security. Here’s how to configure settings based on popular antivirus programs:
For Windows Defender:
- Open Windows Security by searching for it in the Start menu.
- Click on "Virus & threat protection."
- Select "Manage settings" under Virus & threat protection settings.
- Ensure that "Real-time protection" and "Cloud-delivered protection" are turned on.
- Schedule regular scans by clicking on "Scan options" and selecting a frequency.
For third-party antivirus:
- Open the antivirus application from your desktop or Start menu.
- Look for settings or preferences related to real-time protection, scheduled scans, and updates.
- Enable real-time protection and set up automatic updates to keep your software current.
- Schedule regular scans weekly or bi-weekly based on your usage.
Common pitfalls and how to avoid them
When configuring firewall and antivirus settings, users often make mistakes that can compromise security. Here are some common pitfalls and how to avoid them:
- Neglecting updates: Always keep your software updated to defend against new threats.
- Turning off the firewall: Disabling the firewall for convenience exposes your systems to risks. Instead, adjust settings to allow necessary programs.
- Ignoring alerts: Pay attention to notifications from your antivirus or firewall; they often indicate potential threats or issues that require action.
Verification
After configuring your firewall and antivirus settings, verify that your changes were successful:
- For firewalls, ensure that you can still connect to the internet while your firewall is active.
- For antivirus, check that real-time protection is enabled and that scheduled scans are set up.
Conclusion
Now that you've configured your firewall and antivirus settings, monitor your systems regularly for any unusual activity. Stay informed about new security threats and consider periodic reviews of your settings to ensure ongoing protection.