Before installing an update on Windows 11, it's essential to back up your system to avoid data loss. Updates can lead to unexpected issues that may compromise your files or settings. This guide provides clear steps on how to create a system image backup, back up personal files to an external drive, and utilize cloud storage options for additional security.
Why backing up is essential before updates
Backing up your system before updates is crucial because updates can sometimes introduce problems that threaten your data. Issues like file corruption or system instability may occur, especially if an update conflicts with existing software or drivers. Without a backup, you risk losing important documents, applications, and personalized settings, which can be frustrating and time-consuming to recover.
Prerequisites
Before you begin, ensure you have the following:
- A Windows 11 PC
- An external hard drive or sufficient cloud storage space
- A Microsoft account for cloud storage (if using OneDrive)
- Administrative privileges on your computer
Creating a system image backup
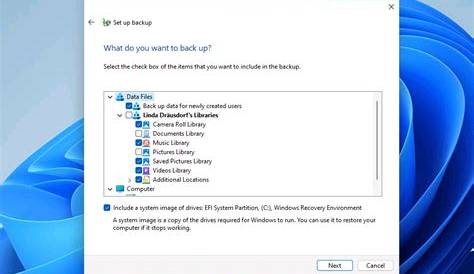
Creating a system image backup allows you to save a complete snapshot of your current system, including Windows, settings, applications, and files. Here’s how to do it:
- Open the Control Panel by searching for it in the Start menu.
- Click on System and Security.
- Select Backup and Restore (Windows 7). (Yes, it's still called that in Windows 11.)
- On the left, click on Create a system image.
- Choose where you want to save the backup: on a hard disk, on one or more DVDs, or on a network location. For most users, an external hard drive is a good choice.
- Follow the prompts to complete the backup process.
- If prompted, create a system repair disc, which can be useful for restoring your system later.
Ensure the external drive has enough space for the backup. This process may take some time, depending on the amount of data.
Backing up personal files to an external drive
In addition to a system image, back up your personal files to secure your most important documents. Here’s how:
- Connect your external hard drive to your computer.
- Open File Explorer.
- Navigate to the folders where your important files are stored (e.g., Documents, Pictures, Desktop).
- Select the files or folders you want to back up.
- Right-click on your selection and choose Copy.
- Go to your external drive in File Explorer, right-click in an empty area, and select Paste to copy your files over.
Double-check that all important files have been copied before proceeding with the update.
Using cloud storage for additional backups
Cloud storage offers an additional layer of protection for your files. Here’s how to use OneDrive, integrated into Windows 11:
- Make sure you’re signed into your Microsoft account on Windows 11.
- Open the OneDrive app from the Start menu.
- Drag and drop files or folders you want to back up into the OneDrive folder.
- Alternatively, right-click on files in File Explorer, choose Send to, and select OneDrive.
- Wait for the files to sync; a green checkmark indicates they are backed up.
Using cloud storage ensures you can access your files from any device while keeping them safe even if your local hardware fails.
What to do if something goes wrong after an update
If you encounter issues after an update, follow these steps to restore your system or recover files:
- If your system is functioning poorly, restart your computer and enter the Advanced Startup Options by pressing Shift + F8 or using a recovery drive.
- Select Troubleshoot, then Advanced options, and choose System Restore to revert your system to the previous state.
- If you need to recover files, connect your external drive or access OneDrive to retrieve your backed-up data.
- Follow the prompts to restore files or reinstall applications as necessary.
Always check for updates after restoring to ensure your system is up-to-date and secure.
Conclusion
By following these steps to back up your Windows 11 system before updates, you can proceed confidently knowing your data is protected. After the update, verify that everything functions as expected. If issues arise, remember that your backups will help you recover your files and settings without stress.
Frequently Asked Questions
How often should I back up my Windows 11 system?
It's advisable to back up your system regularly, especially before major updates or changes.
Can I use other cloud storage services besides OneDrive?
Yes, you can also use services like Google Drive, Dropbox, and others for backing up files.
What if I don't have an external drive or cloud account?
You can use Windows built-in tools to create a restore point or consider purchasing an external drive for better backup solutions.
Is it safe to back up my files to the cloud?
Reputable cloud storage services generally offer strong encryption and security, making them a safe option for backups.